Introduction to Unit
In our unit for the semester, we focused on the exploration of art and art materials in order to build a foundation of understanding for the kindergarteners. Alongside them being able to comprehend, reflect, create, and transfer using the creative process, we wanted to ensure they had a grounding to the processes and materials they used. In doing so, we helped create a foundation of art learnings and understandings for their future art experiences. This involved various styles of simple, yet in-depth critique processes that helped familiarize them with basic art terms and describing what was present in the artwork, as well.
Through the various projects that we designed, students were able to make connections with things that inspired them and were around them in the world. Part of this was how they could tell a story with their art and the other to understand how artists create art. To ensure this, they were able to play and explore with materials to create art founded on a form of story: personal narrative, illustrative, or with a specific purpose. Then they would share these varying stories and other students would be able to reflect and comment on different aspects that they notice in the artwork.
Through the various projects that we designed, students were able to make connections with things that inspired them and were around them in the world. Part of this was how they could tell a story with their art and the other to understand how artists create art. To ensure this, they were able to play and explore with materials to create art founded on a form of story: personal narrative, illustrative, or with a specific purpose. Then they would share these varying stories and other students would be able to reflect and comment on different aspects that they notice in the artwork.
Methods for Integrating Literacy, Numeracy, Technology, and other Components
Throughout the semester, every lesson incorporated the use of literacy primarily through discussions at the beginning of class, when we'd pause during work time to review what was being work on, and when we'd meet at the end of class to talk about things the students noticed. In most cases this came from questions related to the lesson, topic, and learning target for the day.
Numeracy wasn't as present as it could have been, but the main focus was during the Tell-tale Diptych when we were talking about how a Diptych consists of two images. During the process of getting them ready for illustrating, we had them list out different ideas that came to mind when they were working into two columns with four categories, but we didn't emphasize a specific amount.
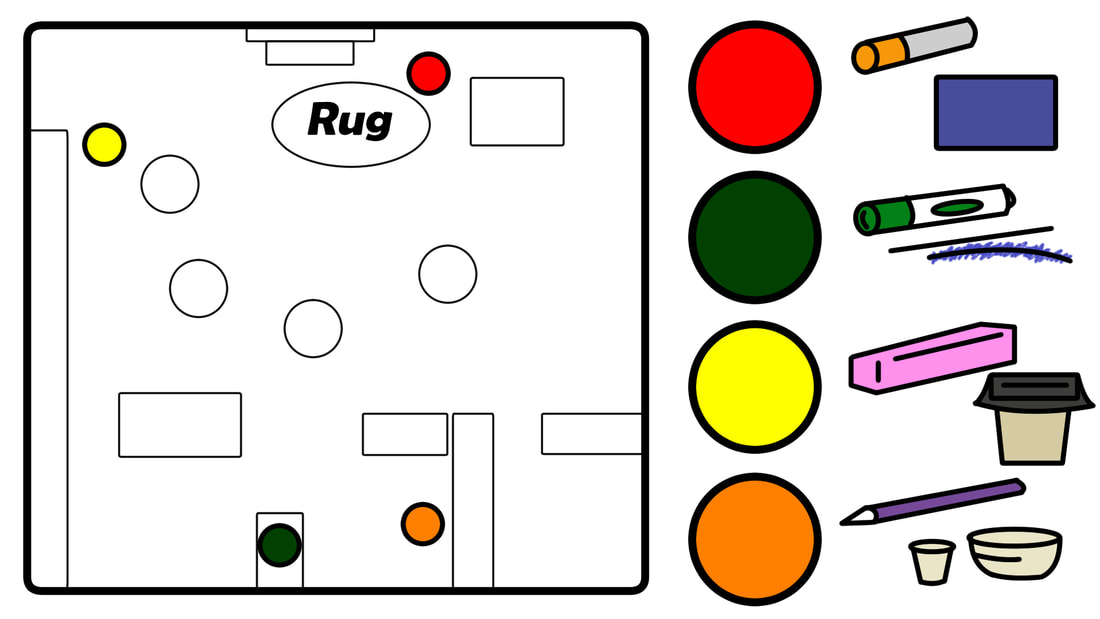
Technology was very present during the beginning of class and near the end of the semester. At the beginning of class, when we would look at last week's work and other artists' works, we would project the images on the smartboard in the classroom. It wasn't until we needed more defined time for clean-up that I created a map of the classroom with color coded dots marking where supplies should be returned to. We had the students gather on the rug to see the image and explain it to them before they went about cleaning up supplies.
As this was primarily a foundation building class, there were no other specific components that come to mind that were used during this semester.
Numeracy wasn't as present as it could have been, but the main focus was during the Tell-tale Diptych when we were talking about how a Diptych consists of two images. During the process of getting them ready for illustrating, we had them list out different ideas that came to mind when they were working into two columns with four categories, but we didn't emphasize a specific amount.
Technology was very present during the beginning of class and near the end of the semester. At the beginning of class, when we would look at last week's work and other artists' works, we would project the images on the smartboard in the classroom. It wasn't until we needed more defined time for clean-up that I created a map of the classroom with color coded dots marking where supplies should be returned to. We had the students gather on the rug to see the image and explain it to them before they went about cleaning up supplies.
As this was primarily a foundation building class, there were no other specific components that come to mind that were used during this semester.
Classroom Management Strategies related to Instruction
At the beginning, Denise's classroom had several management strategies in place that were being learned at practiced by the students. The two main ones were "Attending Skills" and ringing a bell three times. When she would need to make an announcement or when she was in the process of teaching, Denise would state at the beginning for the students to use attending skills, which meant their eyes were on her, they weren't talking, ears were listening, hands were to themselves, and that they remained respectful. As soon as any of them would start straying from one of these things, Denise would stop and mention attending skills again. We borrowed this technique so that we didn't have to create a new system and so that the students wouldn't have to learn a new system. This way it would, also, help with carrying over understanding about the method back to Denise's classroom. The only bump was that we had to make sure the students understood that attending skills in art look the same as the ones in the regular classroom.
The bell was used mostly for getting their attention in the least disruptive manner as possible and to signal when clean up was about to occur. When they were quietly working during solo time, or when they were in art, Denise would ring the bell and wait until all eyes were on her. Then she would give her instructions and ring the bell three times signaling the students to begin. When we were working with less messy materials that had a simple clean up, we utilized the bell to grab their attentions and in the same manner to signal clean up. When it came to later projects, we vouched for using a visual diagram instead of verbal instruction.
Throughout the semester, students were organized in color groups for each table. This allowed us to organize sketchbooks for each student and worked in creating stations for certain materials. When it came to cleaning things up, as well, we were able to give each table a specific job to carry out or thing to focus on. It mitigated some of the inherent chaos of clean up, and allowed us to create the visual aid to help with our instruction.
At the end of every class, we would usually meet on the rug in the front of the room where we'd hold our ending discussion and review. At first, this was done by going around in a circle, but then we started using the stuffed penguin they used to determine who the speaker was and who we should be giving our attention to. Tacky the Penguin was used in Denise's classroom before and served as a great tool to help guide the discussion and reinforce the use of attending skills.
During each instructional period, before work time and clean up, we would ask the students to repeat back what we would be doing next. Before they would be able to continue or move on, they would need to repeat it back otherwise we would spend time again talking about what was expected of them.
During each instructional period, before work time and clean up, we would ask the students to repeat back what we would be doing next. Before they would be able to continue or move on, they would need to repeat it back otherwise we would spend time again talking about what was expected of them.
Lesson Plans and Documentation
|
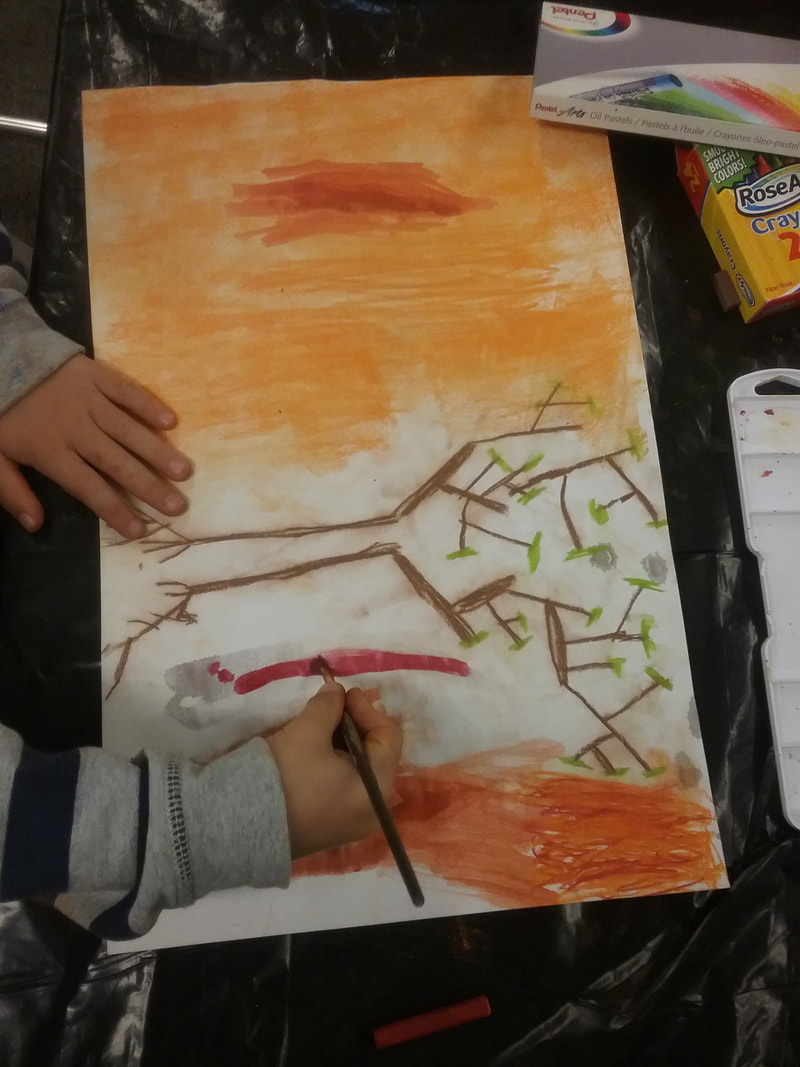
For this lesson, we wanted to focus on how colors can interact with each other and how different materials can affect the outcome. We started with dry mediums (pastels and crayons) so that they could get a feel for how they felt. Following that, we introduced wet mediums (watercolor and chalk w/ water) to show how they varied in comparison to the dry materials. On the last day, we demonstrated how the materials interacted with each other and how that would be used in some of their final illustrations.
They were asked to think of something important to them; this could range from an important family member, a favorite pet, a favorite toy, or a favorite place. As they were designing their imagery, we had them think about the story their illustration could tell about their important things. This included where their important thing would be located or where it could be found: in space, at home, in a park, or maybe even in the school. Their choice of colors was also a factor in how they could use them to create different feelings within their artwork. In one case, a student commented on how their dog had dark fur but included orange because of how energetic they were. By the end of the lesson, they had illustrations that incorporated wet and dry mediums and had a story behind the imagery they chose. |
Day 1: polariskinderexploration2018.weebly.com/lesson-1-day-1-september-14-2018.html
Day 2: polariskinderexploration2018.weebly.com/lesson-1-day-2-september-21-2018.html
Day 3: polariskinderexploration2018.weebly.com/lesson-1-day-3-september-28-2018.html
Day 2: polariskinderexploration2018.weebly.com/lesson-1-day-2-september-21-2018.html
Day 3: polariskinderexploration2018.weebly.com/lesson-1-day-3-september-28-2018.html
|
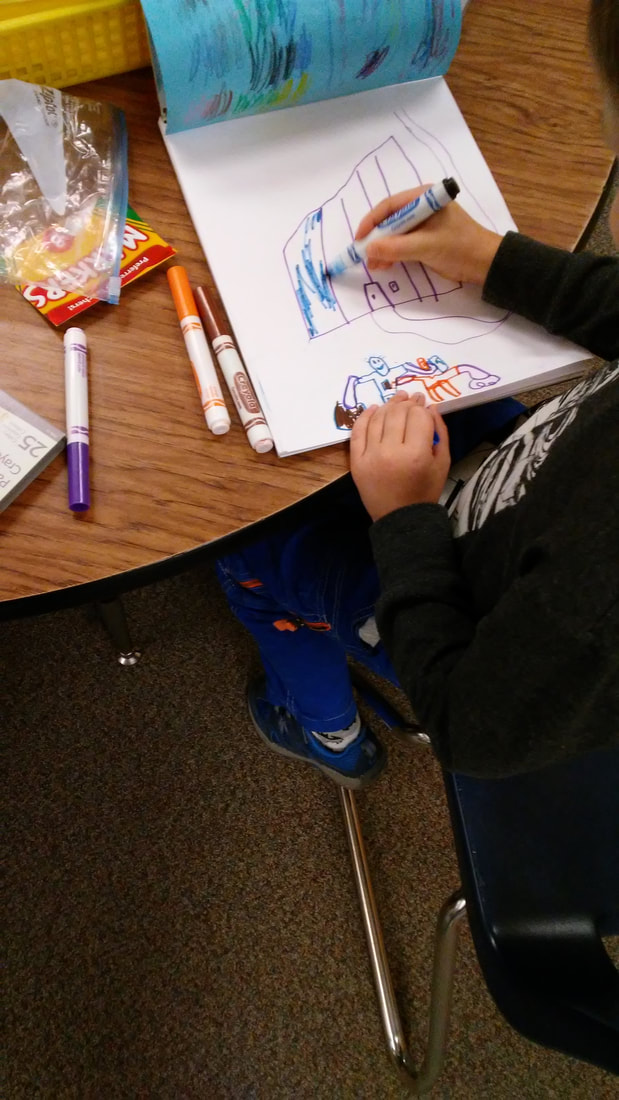
Similar to the way we used dry materials in our first lesson, this one focused more on how imagery can be created through outside influences rather than relying solely on personal ideas. The project itself was designed for the students to listen to a story without too much in terms of pictures or imagery to have them offer their own thoughts on what they “saw”. Following that, they were tasked with creating an illustration of what they saw in the story and explain how they created what they did. This was the precursor to the project final that they’d be working on. The final project utilized two different stories that were connected with one another. After listening to the stories, students were asked to list off some ideas that came to mind while they listened that pertained to: people, places, animals, and things. Once they had a word list for both stories they were then asked to create two illustrations, one on white paper and another on black paper, for both stories. The difference in paper was to have them see the different ways the background color can affect the material put on the paper and offer a visual comparison between the two.
|
Day 1: polariskinderexploration2018.weebly.com/lesson-2-day-4-october-5-2018.html
Day 2: polariskinderexploration2018.weebly.com/lesson-2-day-5-october-12-2018.html
Day 2: polariskinderexploration2018.weebly.com/lesson-2-day-5-october-12-2018.html
|
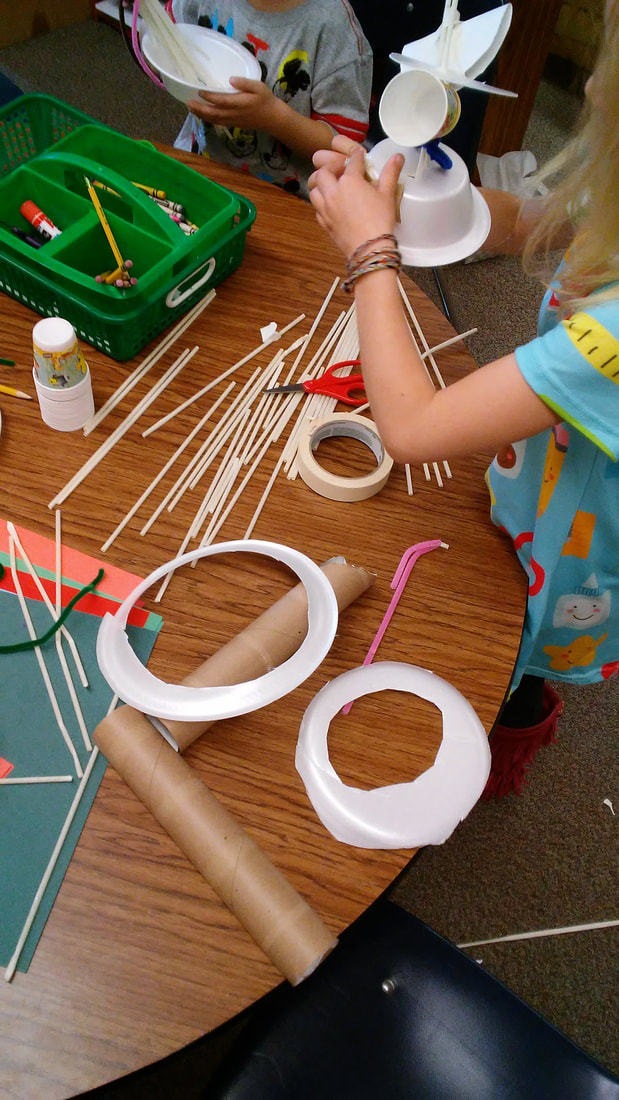
For this lesson, we changed things up from 2-dimensional materials to 3-dimensional materials in order to break out of the flat illustrations we had been working on. When we introduced this project, we asked the students to think about creating a toy that had never existed before that had a purpose. We showed them art from the artists Dominic Wilcox and Alexander Calder (see above), who create sculptures (or assemblages) that include both a purpose and could be considered toy-like in their design. From there, they collaborated with each other on what purposes the sculptures may have had and compare those to the toys they would be making. At first, we had them explore with the provided materials (cardboard tubes, pipe-cleaners, Styrofoam bowls and plates, paper cups and plates, tape, straws, hot glue) to get ideas for how they could assemble their toys. This allowed them to become familiar with the different ways things could be put together and how they looked when placed certain ways. Following their prototyping day, the students moved onto the final ideas, thinking about how they could improve on their previous idea or changing to a completely new one to create. After they were completed, we had the students present their toys to the class by having their peers take guesses at what they could be. The process was similar to the way we had them thinking about Wilcox and Calder, but then we had them explain the purpose of their toy and demonstrate how it was used if they could.
|
Day 1: polariskinderexploration2018.weebly.com/lesson-3-day-6-october-26-2018.html
Day 2: polariskinderexploration2018.weebly.com/lesson-3-day-7-november-2-2018.html
Day 3: polariskinderexploration2018.weebly.com/lesson-3-day-8-november-9-2018.html
Day 2: polariskinderexploration2018.weebly.com/lesson-3-day-7-november-2-2018.html
Day 3: polariskinderexploration2018.weebly.com/lesson-3-day-8-november-9-2018.html
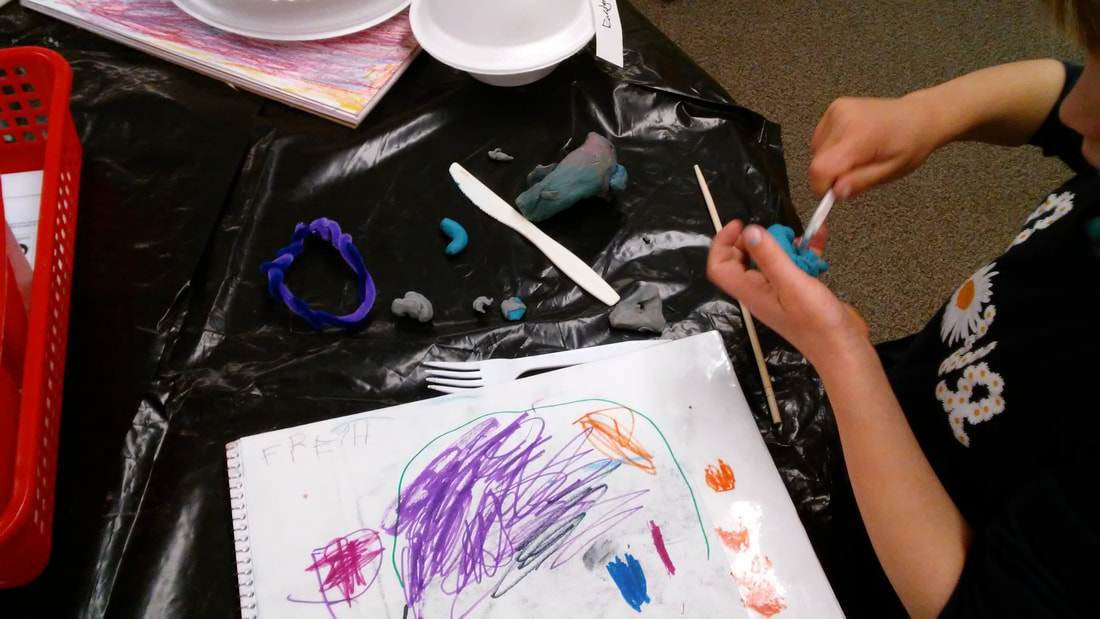
In our final lesson for the semester, we wanted the students to continue seeing how sculptures have a purpose, but this time we wanted them to see them in a more “professional” function that a toy would be. We started the lesson by sharing imagery of reliquaries with them (special boxes usually used to hold objects important to religions) and relating the term to how a treasure box can be used to hold important things. In a similar manner to the toy-maker process, we had them look at varying types of reliquaries (some historical and some from the present) and take guesses at what could be kept in them. We wanted them to think about something they had that was important to them and how they could create a reliquary for that.
Before they began the final building process, we had the students create a small model of what they planned to build using an oil-based clay designed to never, completely harden. As regular clay will dry out without the addition of water, this allowed them to work with the clay as much as they liked to get a sense of how they would be building their final treasure box. Once they finished their maquette (preliminary sculpture), then they moved onto the water-based clay. The aim was to have them create an artwork that had a purpose for what it could hold but we were unable to get to the final reflection for this one, but we intended for them to treat it like a museum display and “decipher” what the artifact could have contained.
Before they began the final building process, we had the students create a small model of what they planned to build using an oil-based clay designed to never, completely harden. As regular clay will dry out without the addition of water, this allowed them to work with the clay as much as they liked to get a sense of how they would be building their final treasure box. Once they finished their maquette (preliminary sculpture), then they moved onto the water-based clay. The aim was to have them create an artwork that had a purpose for what it could hold but we were unable to get to the final reflection for this one, but we intended for them to treat it like a museum display and “decipher” what the artifact could have contained.
